Tuesday

Torn Photo ATCs

I made four Artist Trading Cards for the Torn Photo ATC Swap on the ATCs for All.

It was an interesting process and required all the discipline I could gather to just glue the photo onto a plain backing and not slather it with mixed media collage elements. I'm clearly stuck doing the same, familiar things over and over, and trying to make myself believe that I'm changing things by using different materials. But it's still the same process. So this was a welcome, if slightly uncomfortable change.
2012-9  "Torn Photo ATC #1: Granny"
 The first card ended up being very simple. With just a slight skew to the image to make it appear a bit jarring.
2012-10 "Torn Photo ATC #2: Granny and Great-Grandfather"
Tried to go a little farther this time. But feels like I did the really obvious thing in switching heads around.

2012-11 "Torn Photo ATC #3: Granny/Baby"
For this one I tried to not look so much at the imagery, but at the way the shapes and colors and torn edges and use those elements for the composition. I still see things and immediately name them (head, arm etc.) which is keeping me from seeing it as much as an abstraction as I'd like.

2012-12  "Torn Photo ATC #4: Chicken Coop"
Like this the best of them all as far as having interesting lines and intersections of lines and shapes. Glad I stuck through it. Good exercise in abstraction that I can see using to develop drawings and paintings. Glad to get away from my tried and true mixed media collage. And it's a great way to upcycle all those old photos that aren't interesting enough to keep for the imagery, but that you still can't part with because they're family heirlooms and mementos of earlier times in your personal history.

Flower ATC's

a random assortment of Artist Trading Cards I've done using flower images and themes:
2011-91 "White Flower" ATC
 Rubber stamp, embossing inks, pen and ink, marker and stamp pads on bristol.
2011-92 "Yellow Flower" ATC
 Rubber stamp, embossing inks and marker on bristol.
2011-93 "White Flower #2" ATC
Rubber stamp, embossing ink and marker on bristol.

Vintage ATCs

a random assortment of Artist Trading Cards I've made using vintage images and/or themes:
2011-90 "Emotional Intensity" ATC
Vintage photos, text from Carl Jung's "Man and His Symbols" using encaustic, acrylic & metallic markers on watercolor paper.

Wednesday

Universal Craft Blog Directory


If you have a crafty blog, join here. Or if you're looking for an extensive list of crafty blogs visit!.

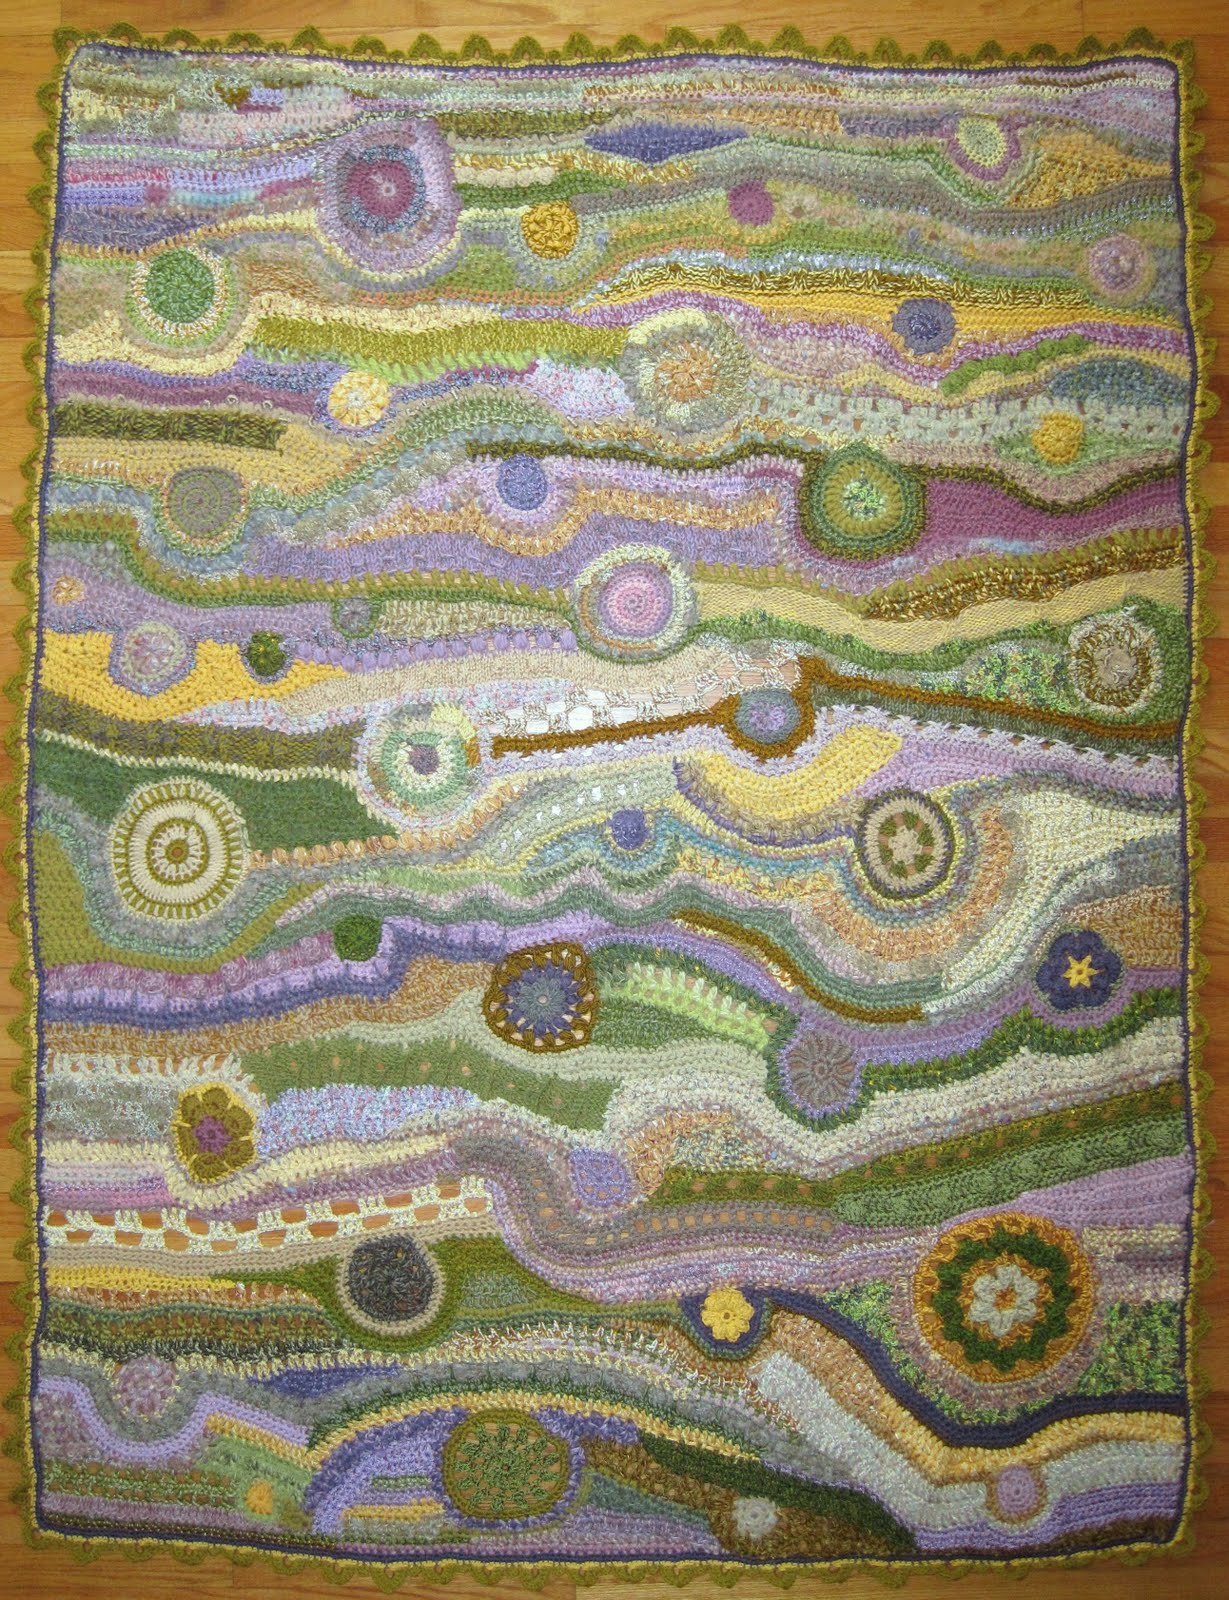
Freeform Afghan - Second Version

Finished! My second attempt at a Freeform Blanket


10/18/10: 
I’m starting a new blanket - trying to do a bit more “controlled” freeform than I have in the past. I’m wanting something that’s a bit calmer and more serene - not quite as tumultuous and busy as the last one. I’m wanting something linear that flows around circular shapes. Usually I cut a piece of fabric in the general shape that I want the piece to end up. This time I made a paper template (I've compiled a list of standard or average blanket and afghan sizes here) so I can draw in where I want the circles and can look at the big picture as I go instead of just randomly putting together shapes that have just sprung forth. (Which I love to do - just wanting to do something different this time.) I guess it could more rightly be called directed freeform.

My color choice is driven by an old Kaffe Fassett pattern featuring multi-yarn triangle shapes that I started about 5 years ago and never finished. I unraveled it, which made some interesting “Magic Balls” that got me started. I made up a bunch of different circle motifs, using patterns from “Beyond the Square, Crochet Motifs” by Edie Eckman. This is without question the book I use more than any other in my library when looking for interesting patterns in inspiring colors with easy to read written instructions and charts. 


Working about 10" ahead at a time I laid out the circles and then crocheted and knitted in stripes across. I drew lines every 10" just to have reference points.
Working towards the first 10" line


I joined my husband at a work conference on the Chesapeake. While he spent his days in meetings I wandered through the nearby towns and as always seems to happen came across some yarn stores. I bought a few yarns that seemed like they'd be perfect.
Yarns from Fibre Cafe in Cambridge, Maryland


Yarns from Yarns & Company in Easton, Maryland


I bought some really beautiful yarns, but some of the colors were really, really off. I cut some pieces of ribbon and attached the yarns onto them by color. I kept these in my handbag & pulled them out whenever a yarn store appeared in my path. It's a great system that's easy to maintain.


10/25/10:
I’ve been struggling to keep this going - not happy with the way it was heading and having trouble figuring out what to do next. On a meander through Ravelry I came across Melisseio’s Free Range Wrap which got me thinking about how I was approaching the whole thing. Between that and a couple of very encouraging Ravelry messages from Jenny Dowde (JenOz on Ravelry) and looking a bit at her work I’m back into a happy mind about where it’s heading. It’s a very different process than I usually use while “freeforming” in that I’ve got a much more specific idea of where I want to end up and how I want the piece to appear. I’m also using colors that are quite out of my usual sphere. Jenny's book, Freeform Knitting and Crochet  is one I often turn to when needing inspriation or a bit of technical direction.


11/8/10


It’s going much more quickly now. Am keeping up with my 10” per week goal - mostly because I’m already planning the next 3 or 4 projects & can’t wait to get this one finished & get onto those. 


almost finished - just need an edging


11/20/10:


The basic shape is finished. It’s feeling like it needs a border. Something sort of wavy so the uneven edges aren’t so noticeable.


12/3/10:


Finished! I decided I needed a border to finish it off. Used #54 from “Around the Corner, Crochet Borders” by Edie Eckman. I modified it slightly - I did 2 base rounds in purple, then did round 1 in yellow and round 2 in green.

This is the other Edie Eckman book that I use constantly. It's got great pictures, and it's easy to modify the instructions to fit the specific edging that you're trying to achieve. 

detail of edging

Tuesday

Zentangled ATC's - Assorted

A random assortment of ATC's featuring "Zentangles" (learn more about zentangling here) :

Cara (11/29/2011)

 Zentangle Pattern Organza: 6 variations
My favorite pens for tangling. They come in a set so they're easy to through in your bag and take with you. Plus the plastic sleeve keeps them organized. I also find having them all together reminds you to switch sizes when working on a piece. And this is a great price compared to my local Aaron Bros....
:


My favorite reference book for ATC's is 1000 Artist Trading Cards. It's a source of endless inspiration.

Wednesday

Mixed Media Collage ATCs: Profiles

A series of ATC's using cut out profiles and mixed media techniques:

Profile ATCs
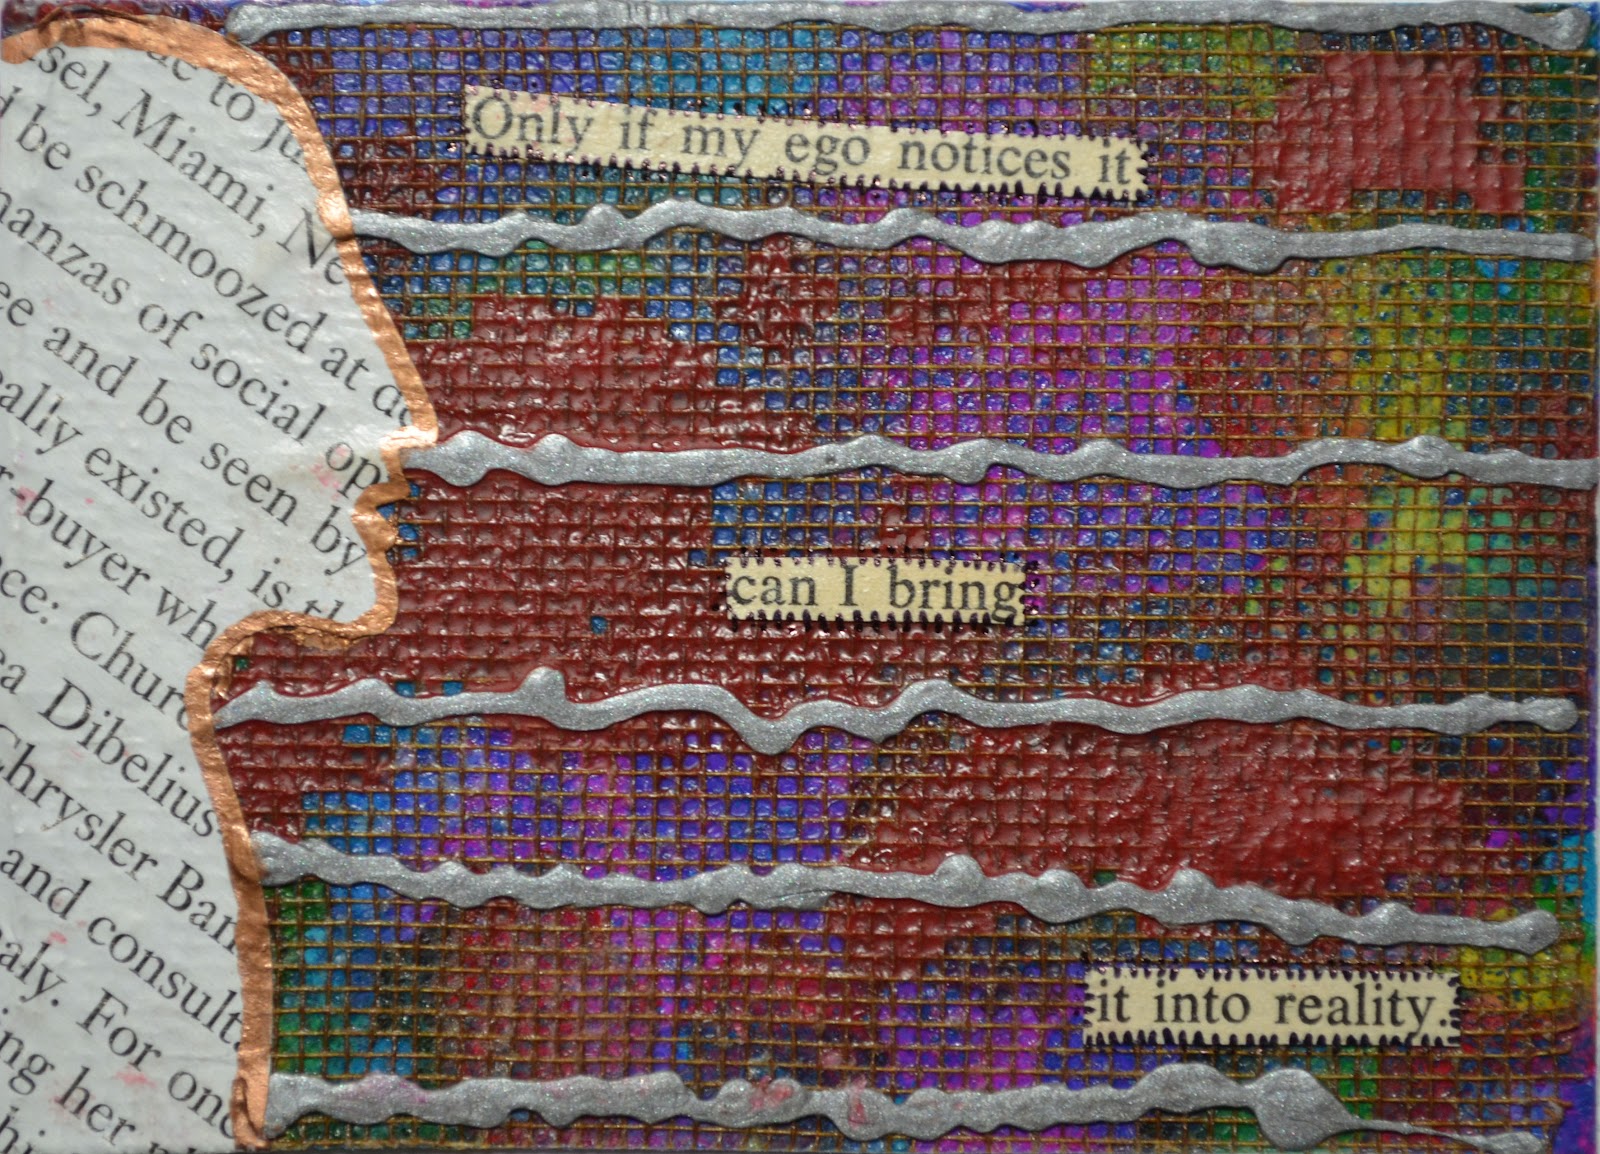
I used the same profile shape in each of these Artist Trading Cards. Some of the profiles were cut out and glued on top of another image, and sometimes I used glued the negative space left from where the head had been cut out on top of other images. I wanted to have so many layers of paint, paper, and found bits of stuff that the original layer could not be seen at all.

I was once again inspired by, and used several techniques from, my favorite book on the subject: Artist Trading Card Workshop: Create, Collect, Swap. Highly recommend it!


These cards were swapped as part of the ATCs For All "Artist Choice" swap.

2011-86 Redhead 


 Maps and decorative papers with encaustic, melted wax, paint and markers.

2011-87 Linear Thinking
 Found book pages with melted wax, handmade paper and decorative papers with pen & ink and marker.
2011-88 Reality
 Tissue overlay on chalk resist (instructions here), found book pages, marker and liquid embossing.
2011-89 Blue Head
Tissue paper on printed paper.

2011-99 Deep Interest
 Pen & Ink drawing with decorative papers and fortune cookie fortune.

My "Inspired by Edie Eckman's Beyond The Square" Afghan

I used Edie Eckman's book, "Beyond the Square" crochet motif guidebook to make circles for my freeform afghan and enjoyed the square making process so much I've decided to make one of each of the motifs in the book and somehow put it together into an afghan.


Thursday

Zentangled ATC's - Pattern Variations

I'm participating in a series of Zentangle Pattern variation swaps on Swap-Bot.  Each Artist Trading Card is made using one or more Zentangle Patterns beginning with a particular letter. Tangle Patterns is a great resource for an alphabetical listing of patterns with links to instructions. And here's a link to the list of "Official" Tangle Patterns.


Zentangled Pattern Series: A
 Zentangle pattern afterglo using .05Copic marker on polka dot paper.

Zentangled Pattern Series: A

Zentangle Pattern Aah using Copic .05 marker on hand painted paper.
Zentangled Pattern Series: B

The ATC on the left is the Zentangled pattern Bridgden. The card on the right has: Beadlines, Bateek, Bales, Barber Pole, Basketweave and Baton. First time I've used so many patterns in such a small space. very busy.....

Zentangled Pattern Series:C
 On the left are the Zentangled patterns Carres and Chard. I used the cover of a Tiffany catalog and a Copic .05 marker. On the right is teh Zentangled pattern Cockles 'n Mussels drawn with a white Sharpie Poster Paint marker (the best white pen I've found for Zentangling) on dark blue card stock.

Crocheted Zig Zag & Freeform Bag

I used up more bits from the endless box of leftover needlepoint yarn to create a bag for my daughter.
Delaney's new bag


I started by making a simple zigzag rectangle of single crochet stitches turned on it's side.

The zigzag is inspired by one I saw in Sasha Kagan's book "Crochet Inspiration". It's one of my favorite books for having a good variety of stitch and motif patterns. My daughter wanted something that was vintage-y but modern. This reminded me of old afghans throw over Granny's couches.

I made a rectangle 13" x 24" using this pattern:

With Needlepoint yarn and G hook, Chain 80.

Foundation Row (right side): Work 2 sc in 2nd ch from hook. *Sc in next 5 ch, skip next 2 ch, sc in next 5 ch, work 3 sc in next ch.  Repeat from *, ending last rep with work 2 sc in last ch. Change color. Ch 1. Turn.

Row 1: Work 2 sc in first st, sc in next 4 st. *Skip next 2 st, sc in next 5 st, work 3 sc in next st, sc in next 5 st. Repeat from *. Work 2 sc in last stitch. Change color. Ch 1. Turn.

Repeat this row changing colors every row. I used 18 different colors of yarn.

the freeform flap on the blocking board

For the flap I made a freeform shape using rows and squares built upon each other. I just sort of started with a color and did rows and then changed direction and patterns fairly randomly.


Delaney's Crocheted Bag

I used a magnetic button clasp and sewed a vintage button on the front.
the back of Delaney's bag
For the strap I made 24 double crochet granny squares:
will post the instructions when I can find them!


Paisley ATCs

ATC 2011-74: Zentangled Paisley ATC

 white ink drawing on business envelope liner
ATC 2011-75: Paisley #1
 Rubber stamps, book pages, and ink on paper
ATC 2011-76: Paisley # 2
 Rubber stamp and ink on collaged papers
ATC 2011-77: Paisley # 3
 Ink on paper
ATC 2011-78: Paisley #4
 Alcohol ink, metallic paint, rubber stamps and ink on paper
ATC 2011-79: Paisley #5
 Ink and embossing powders on paper
ATC 2011-80: Paisley #6
 Acrylic paint, embossing powders and ink on paper
ATC 2011-81: Paisley #7
Acrylic paint, alcohol ink and ink on paper

Tuesday

ATC Background Technique: Oil Pastel Resist

purple oil pastel with blue acrylic paint
 I happened upon a new technique for ATC backgrounds using gesso, oil pastels & acrylic paint.

orange oil pastel with purple acrylic paint
 As I make more I'll take photos of each step.

Supplies: ATC (needs to be pretty sturdy stock - junk mail postcards are a good free possibility); Gesso, Oil Pastels, Acrylic Paint, Paper bigger than ATC

Tools: Pallet knife or gift card, paint brush, brayer


1. Cover card with gesso. It should be unevenly spread, leaving ridges and valleys. I generally use either a pallet knife or credit/gift card to spread the gesso on. Let gesso dry completely.


2. Draw over card with oil pastel. Make it sort of uneven with some areas heavier than others.


3. Paint over card with acrylic paint. I use a pretty dry brush and paint unevenly over the whole card. Have the brayer & paper right at hand before you start painting.


4. As soon as you've finished painting, quickly lay the paper over the card & roll the brayer over the entire card. Lift paper to see what's happened. If you like it, you're done. If not you can lay the same paper over again & roll it with the brayer, which may deposit some of the paint from the paper back onto ATC. Or, you can use a clean piece of paper and remove more paint from the ATC. The images on the paper can be interesting as well. And you can reuse the same paper on different ATC's/colors to have layers of contrasting colors.

Swap-Bot's 100,000th Swap

I've been swapping on Swap-Bot since February of 2008. I've completed 105 swaps & Swap-bot has just celebrated their 100,000th swap, with 653 people swapping any piece of Swap-Bot themed snail mail. My assigned recipient listed Miss Kitty as her top favorite thing so I gave a stab at a Miss Kitty themed ATC. Miss Kitty's sense of style most certainly doesn't come naturally to me, but here's what I came up with:

I used a new (to me at least) oil pastel resist technique that I describe here.

Saturday

ATC Background Technique: Tissue Overlay on Chalk Pastel

I came up with this technique while working on a Sentence-A-Day Art Journal, and have started using it as an ATC background as well. I wanted to be able to write on top of chalk pastel without having it smear.

Finished Page
Materials & Tools:

Paper (this is a medium weight watercolor paper), Gesso, Chalk Pastels, Tissue, Mod Podge

Steps:
1. Apply gesso unevenly to paper with palette knife or gift card, leaving ridges. Let gesso dry completely.


2. Color randomly over the gessoed surface. It's a messy, chalky process.

3. Add a second color of chalk pastel, being mindful that it's easy to smudge what you're working on.

4. Cut tissue a bit larger than the paper. Carefully apply Mod Podge (matte used here) to one side of tissue, bieng very gentle as tissue tears easily. Carefully lay tissue onto paper. If you move it around as you lay it down it will smudge the pastel. Rub over the tissue to make sure it's completely attached. Apply a coat of Mod Podge over the whole surface. I rubbed a bit in some areas to tear away the tissue and reveal the pastel layers below. The Mod Podge will seal these spots.